
A forty-field form on one page is a lot to ask of anyone. People scroll, get a sense of how much work it'll be, and close the tab. The ones who do start often stop partway through, not because they changed their mind but because they need to go find a certificate, a reference number, or some other document.
The problem is, when they leave, everything they typed is gone. When they eventually come back, they start over from scratch. And most of them don't come back at all.
This guide tackles both sides of that problem: breaking the form into smaller steps that feel doable, and letting people save their progress and return later from a link sent to their email. They land right on the step they left, with every answer still there.
What you'll need
You'll need Joomla 5 or 6 and NXForms Pro. Step Break fields, conditional visibility, the multi-file upload field, Save & Resume and PDF export are all Pro features.
You also need email delivery that actually works, because resume links arrive by email. If you haven't tested that yet, do it before you build anything. In Options → Email you'll find SendGrid, Mailgun, Postmark, Brevo, Amazon SES, SMTP2GO and custom SMTP alongside Joomla's server mail, and each option has a test button. A resume feature that relies on broken mail causes more trouble than it solves.
1. Plan the steps before you build them
The instinct is to group fields by database table: personal details, company details, then documents. Resist that. Group them by what the applicant needs to have on hand instead.
Anything they can answer from memory goes early. Anything that makes them go digging through a filing cabinet goes late, and ideally gets its own step. That way the natural pause while filling in your form lands right on a step boundary, which is exactly where Save & Resume helps most.
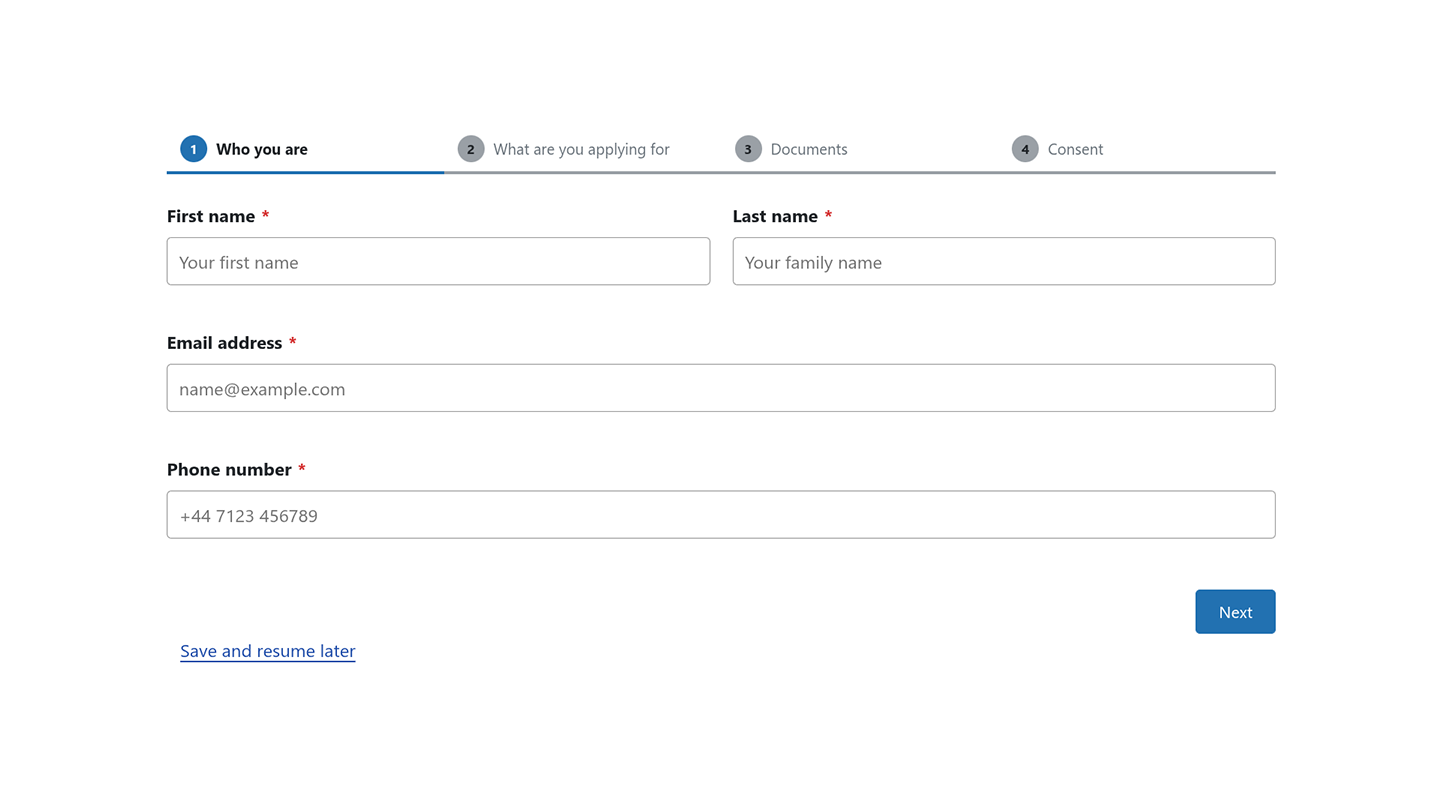
Here's a four-step shape that works for most applications:
- Who you are: name, email, phone. Quick wins that build momentum.
- What you're applying for: the substance.
- Documents: uploads, references, registration numbers.
- Declarations and consent.
2. Insert the Step Breaks
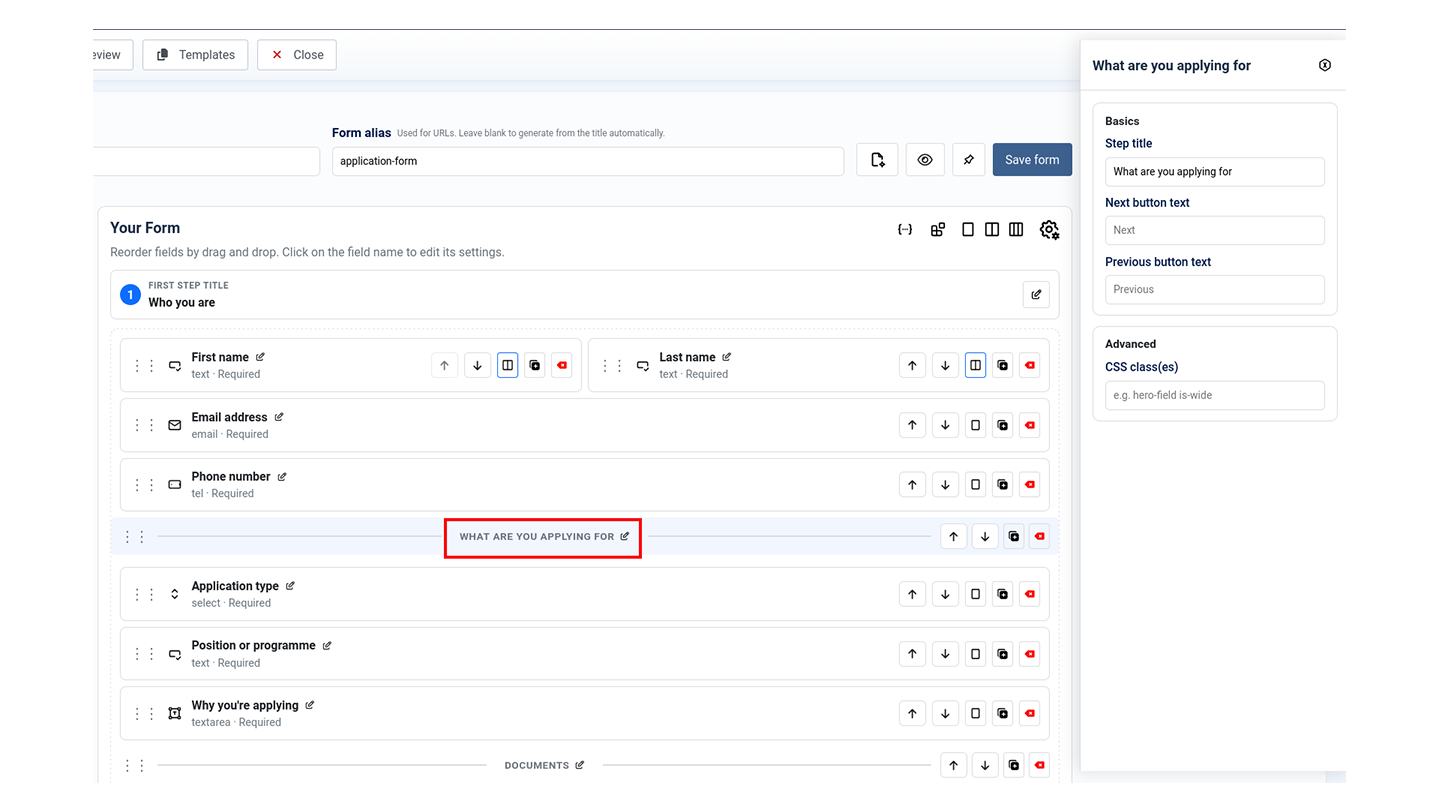
Steps aren't a setting; they're a field. Drag a Step Break from the palette onto the canvas wherever you want the form to split.
The rule is simple once you've seen it: fields above the first Step Break form step 1, fields between two Step Breaks form the next step, and fields after the last Step Break form the final step. Three Step Breaks give you four steps.
3. Label the buttons like a human
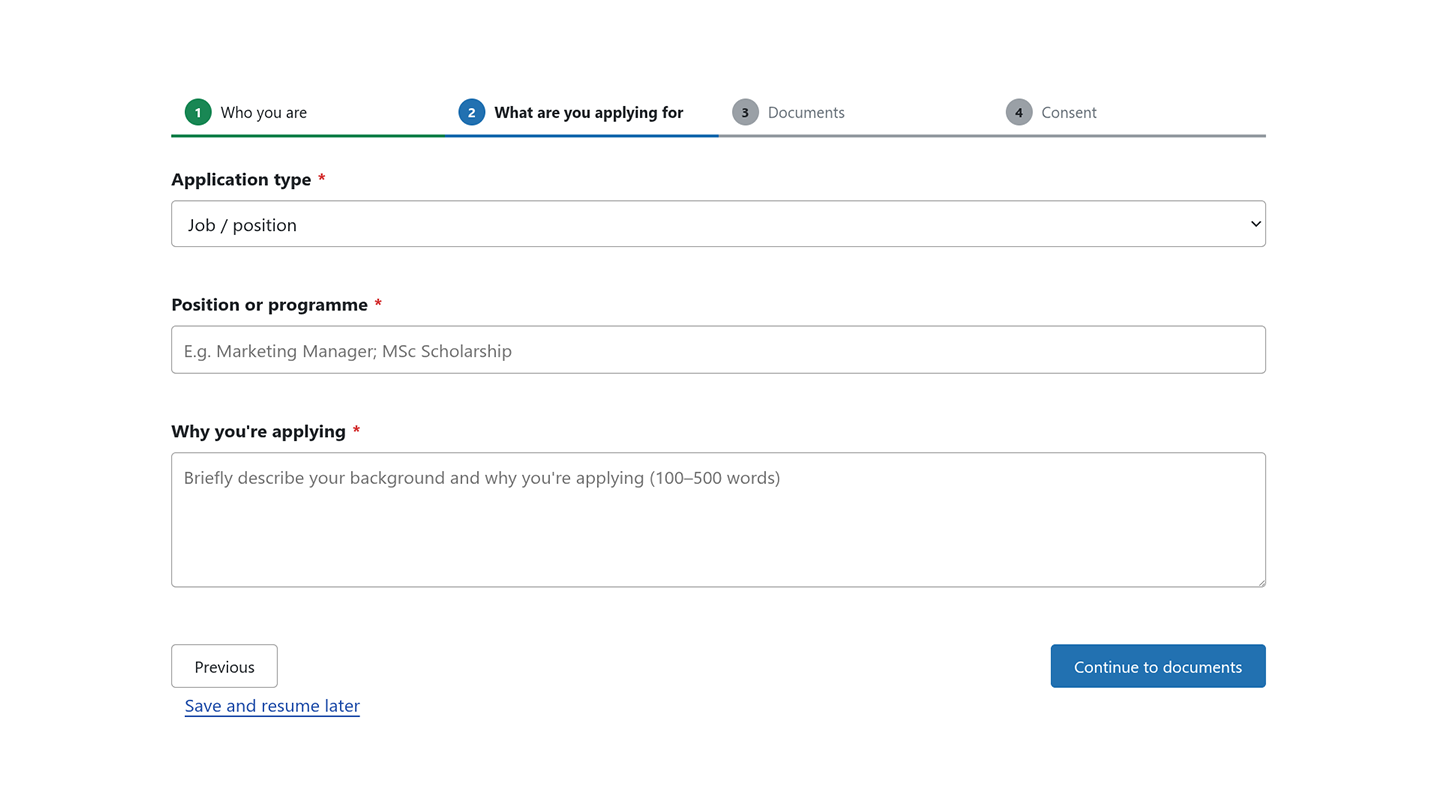
Each Step Break lets you override the Next and Previous button labels, which default to "Next" and "Previous". Use that. "Continue to documents" sets an expectation; "Next" just makes people wonder how many more there are.
4. Understand what gets validated, and when
This is the part that most affects how the form feels.
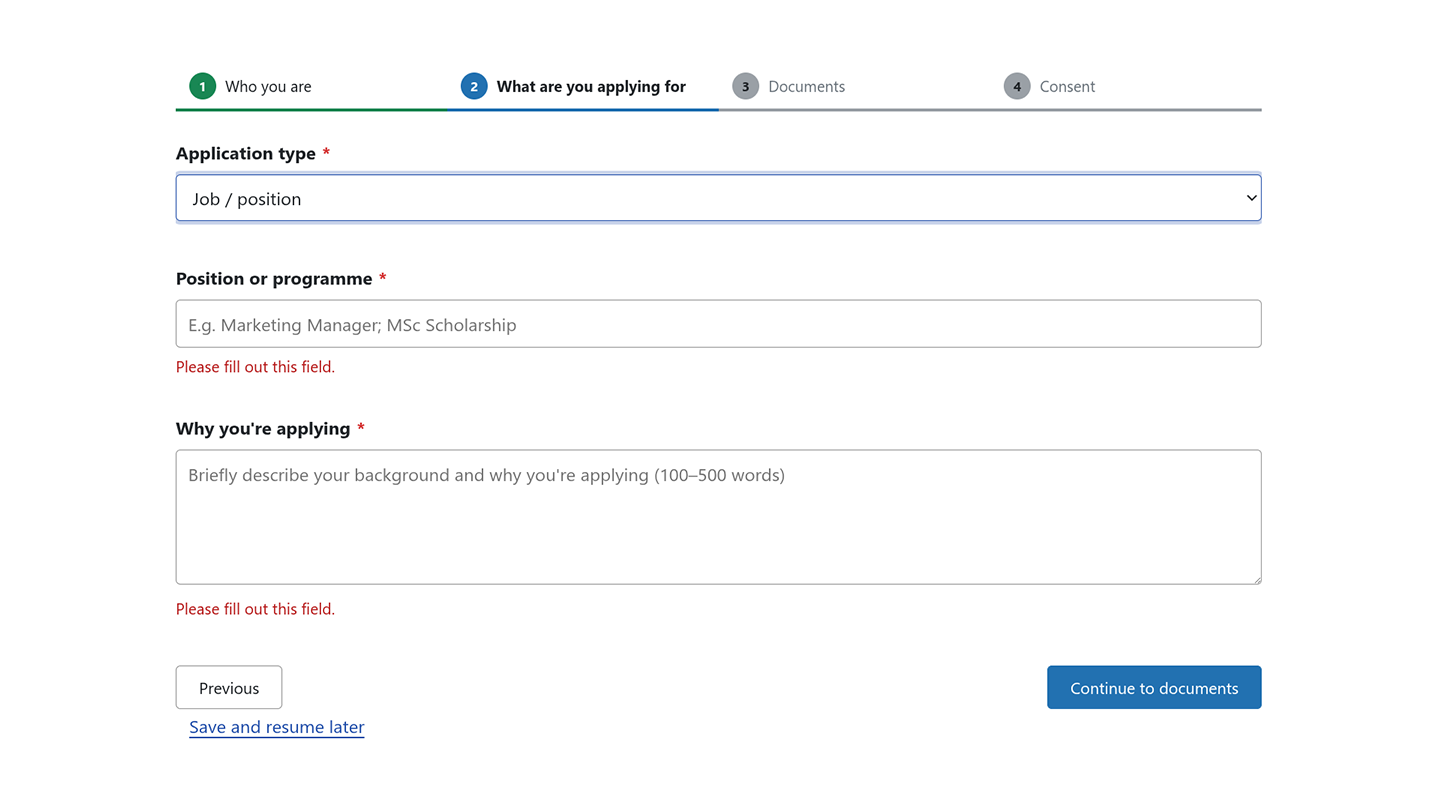
When a visitor clicks Next, only the fields on the current step are checked. If a required field is empty or filled in incorrectly, they stay on the step and see the problem right there. No jumping ahead and losing context, and no wall of errors for fields they haven't even reached yet.
Previous moves back without re-checking anything, so someone can go back to double-check without being told off about a field they were still working on.
The submit button only appears on the final step. The definitive check happens server-side when the form is submitted. The per-step checks exist to guide the visitor, not to replace that final validation.
5. Hide the steps that do not apply
Most application forms ask questions that only matter to some applicants. Instead of making everyone read them, use conditional visibility.
A rule has three parts: a field, an operator and a value. The operators are equals, not_equals, contains, not_contains, greater_than, less_than, is_empty and is_not_empty, and you can require All conditions or Any of them.
Two behaviors worth knowing, because they'll save you a lot of confusion:
- Rules bind to a stable internal field key, not the label. Rename "Company name" to "Organization" and every rule referencing it keeps working.
- Hidden fields aren't submitted, and validation skips them entirely. A required field that's hidden by a rule won't produce a validation error. This is what makes conditional steps practical: you can mark fields required without worrying that an invisible one will block the form.
6. Let people attach several documents at once
Applications rarely need just one file. Swap the File Upload field for the multi-file upload field and set a per-file size cap and a maximum file count.
One behavior matters here: if any file in the batch fails validation, none are stored. So you never end up with a half-uploaded application that looks complete to the applicant but isn't to you. Uploads are checked on content as well as extension, and the upload directory is hardened against execution no matter what gets sent.
The stored value is a list, and it renders as clickable links everywhere downstream: the admin submissions list, the PDF, the notification email body, CSV exports and integrations. Available file-type categories are Images, Documents, Spreadsheets, Audio & Video and Archives.

7. Turn on Save & Resume
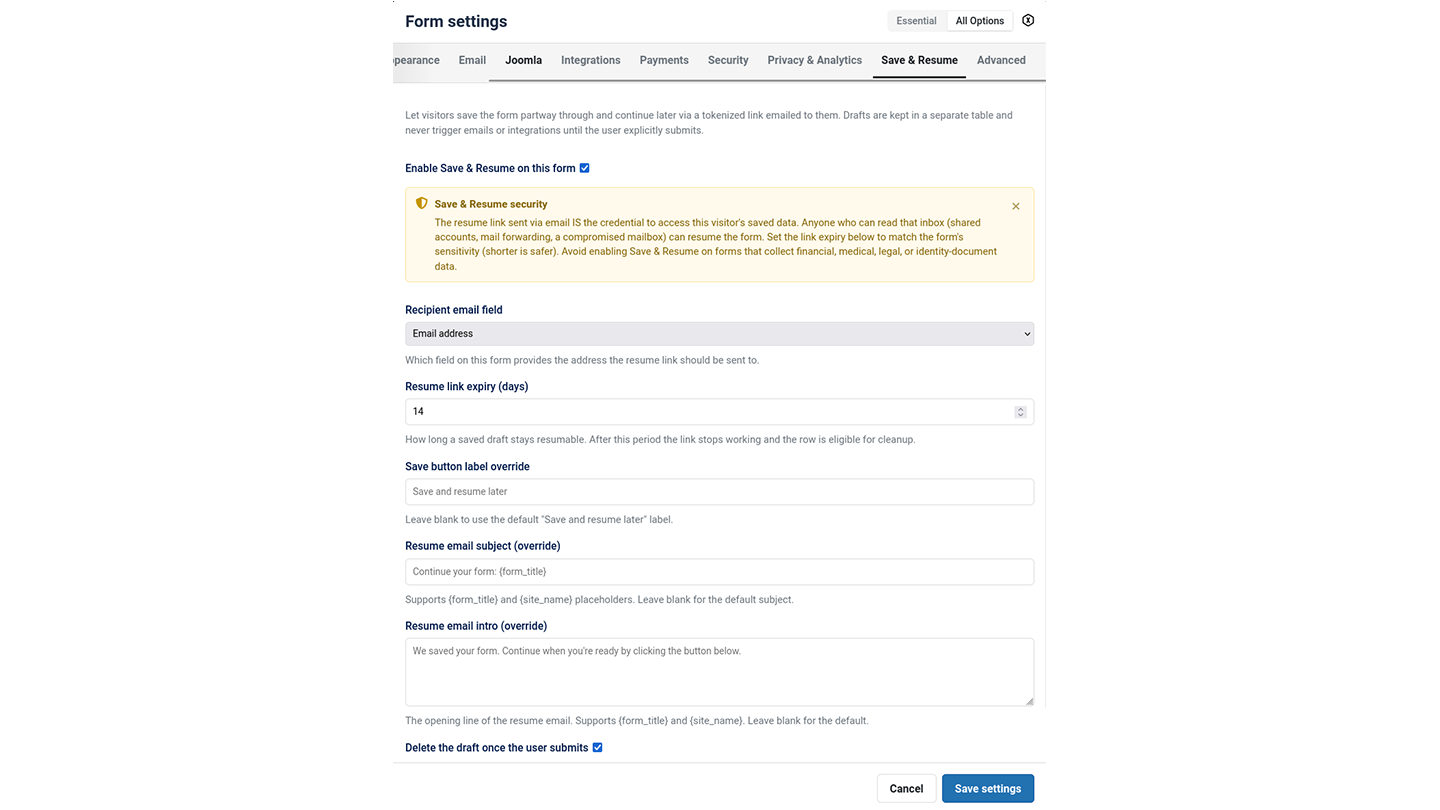
Open Form Settings → Save & Resume. You'll need to set four things:
- Enabled
- Adds a "Save and resume later" button to your form.
- Email field
- Which field on your form holds the address the link should go to. Save & Resume needs at least one email field to exist, which is why step 1 collects it.
- Link expiry
- Defaults to 14 days. Treat it as a security setting, not just a convenience.
- Button label, email subject and email intro
- Write these in your own voice.
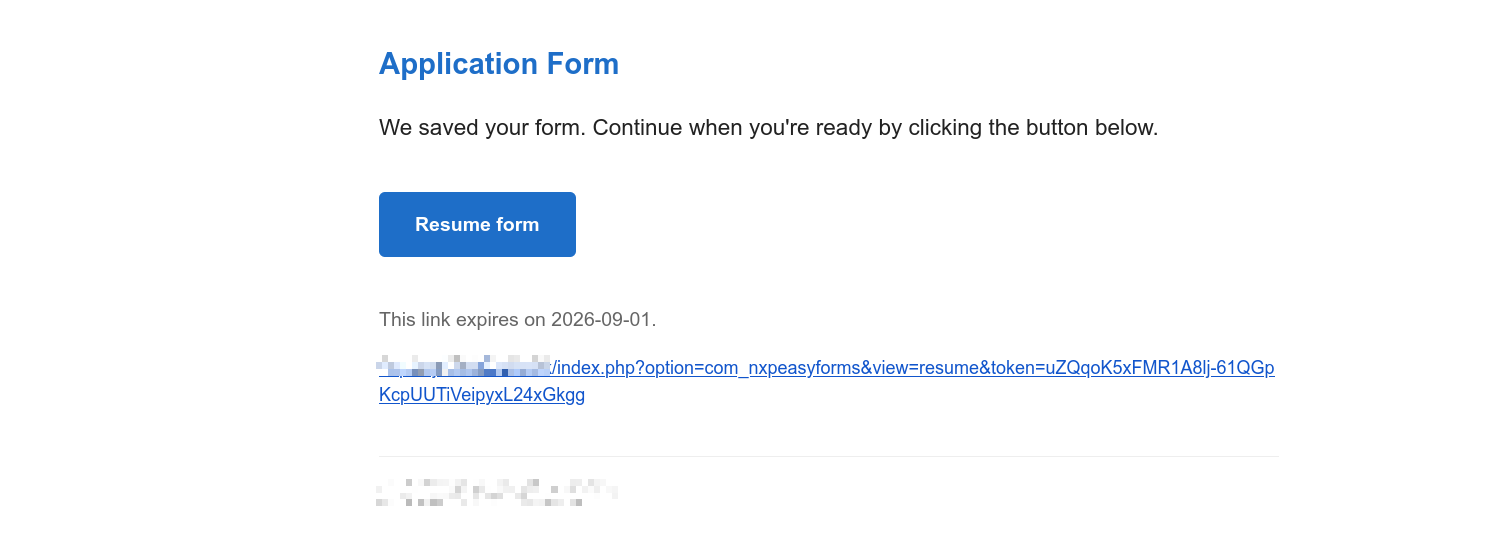
When a visitor clicks save, they type their email and get a one-click resume link. Expired drafts are cleaned up automatically, and once a draft is submitted, it's marked so the same link can't be used twice.
The resume link is secured in a way worth knowing: the server checks the token, keeps the draft reference in the session, then sends the visitor to a clean URL. The token never hangs around in the address bar, the browser history, or a bookmark.
When not to use this
The documentation is honest about this, and you should be too: Save & Resume isn't a great fit for forms collecting financial, medical, legal or identity data, unless your organization has explicitly decided it's okay to keep partial submissions. You'd be storing an incomplete copy of someone's sensitive data, reachable through an emailed link, for up to your expiry window. That might be perfectly fine, but it should be a decision you make, not something that happens by accident.
8. Close the loop: confirmation email and PDF
Two things make the difference between a form and a process.
A confirmation email to the applicant. The recipient comes from a chosen email field; the sender and reply-to are admin-controlled, so a visitor can't make mail appear to come from someone else. The body accepts {{form_title}} and {{field:<name>}} placeholders, and runs against the redacted submission data, so anything behind a password rule stays redacted in the confirmation.
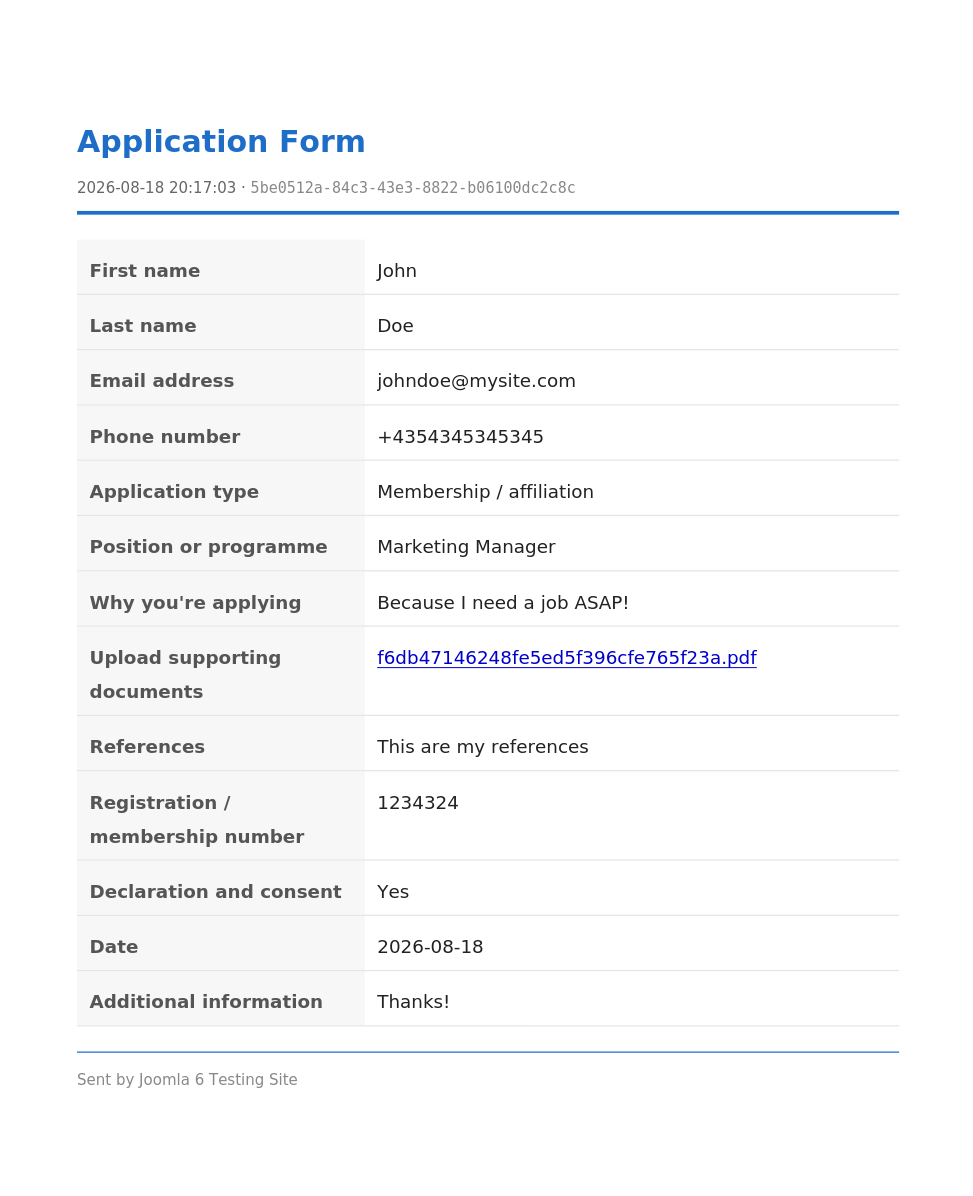
A PDF for whoever reviews applications. Every row in the submissions list gets a Download PDF action, and the same action appears inside the Preview modal. The PDF carries the form title and submission date, a two-column field/value table, your configured footer, and references to uploaded files.
Brand it once in Components → NXForms → Options → PDF: a logo picked from your images/ folder (PNG or JPEG; SVG is excluded on purpose, for security), an accent color and footer text.
One limitation to check against your applicant base: Latin Extended and Cyrillic render out of the box, but CJK and Arabic don't. If you accept applications in Japanese or Arabic, test before you promise anything.
9. Test it properly
Run through these four checks. Do them in a private window so you're not testing against your own logged-in session.
- Forward and back. Walk all four steps. Trigger a validation error on each Next. Confirm Previous doesn't re-check.
- Conditional steps. Take a path that hides fields, and confirm the form submits without complaining about required fields you never saw.
- Abandon and resume. Fill steps 1 to 3, click save, close the browser entirely. Open the email, click the link, and confirm you land on step 3 with your answers pre-filled and the URL clean of any token.
- Double submit. Submit the resumed draft, then click the original resume link again. It must not create a second submission.
Troubleshooting
- No "Save and resume later" button appears
- Either the form has no email field, the feature is switched off, or the license isn't active. On the Free edition the button never appears on the public site, no matter what's configured.
- The resume email never arrives
- Test email delivery on its own before blaming the feature. Send a test from Options → Email. If server mail is being silently dropped, switch to an API provider.
- The resume link says it has expired
- Check your expiry setting, and remember expired drafts are deleted automatically, so an expired link has nothing left to restore. Raise the window if your applicants genuinely need longer.
- A required field on a hidden step is blocking submission
- It shouldn't be, so check the rule is actually matching. If the field is visible when you think it's hidden, the condition is wrong. Verify the operator and the value, particularly for checkboxes where the stored value may not be what you assume.
- Uploads did not come back after resuming
- The restore covers field values, step position and conditional state. Test what happens to uploads on your own install before telling applicants they can leave mid-upload and come back.
- The steps render as one long form
- Step Break fields can't be added on Free. If a Pro license lapses, existing steps are kept and locked rather than deleted, but you can't add new breaks until it's active again.
Where to go next
If your application involves pricing, the live price quote calculator guide covers the Calculation field. Reference detail lives in the Multi-step forms, Conditional visibility and Save & Resume documentation.